


I have been building NodeJs RESTful API with the help of ExpressJs and a ton of other node packages known as npm packagesfor a while now, and all has been going well. But for some reason recently, I began to wonder about the capability of NodeJs as a language on its own. Hence, I began to dig into NodeJs documentation found here. To document my findings and also put my learnings into practice, I decided to do what would normally be done with the help of a framework with just NodeJs alone.
Therefore, in this article, we will be building simple user management RESTful API without using any package, yes, no package!😅
Prerequisites
Install NodeJs on your local machine from https://nodejs.org/
Alright, let’s get coding… 🕺
create the project folder on your desktop or in any other folder you’ll like to house the project in, call it just-node-API (or any other name you wish to call it)
$ mkdir just-node-api
$ cd just-node-api
To initiate the project as a node project, run the following command:
$ npm init -y
This creates a file called package.json (a file that serves as a manifest for our project). Notice the flag -y that is in the command above, it allows you to initialize the node project using the default parameters.
Next, create a file called server.js
$ touch server.js
Add the following code to the file
const http = require('http');
const hostname = '127.0.0.1';
const port = 3000;
const server = require('./route.js'); // imports the routing file
server.listen(port, hostname, () => {
  console.log(`Server running at http://${hostname}:${port}/`);
});
The server.js file is the one that handles the starting up of the server, the server will run at port 3000, also note that another file is required in the server.js file, that is the route.js file. This file will be created next.
Create the file by runningtouch route.js on your terminal. This file will handle the routing of the API endpoints to be created in this application.
Creation of the GET endpoint
For this endpoint, we will be using a dummy database (basically an array of data) stored in a file to be called userData.js, create the file in the root of the project, and populate it with the following data (remember to personalize it to fit your need/taste 😉)
module.exports = users = [

 {
   id: 1,
   name: 'Seyi',
   location: 'Buenos Aires'
 },
 {
   id: 2,
   name: 'David Khan',
   location: 'Argentina'
 },
 {
   id: 3,
   name: 'Isaac',
   location: 'Kwala lumpor'
 }
];
Inside the route.js file created earlier, add the following code
const http = require('http');
const url = require('url');
module.exports = http.createServer((req, res) => {
    var userOps = require('./controller.js');
    const reqUrl =  url.parse(req.url, true);
// GET endpoint
  if(reqUrl.pathname == '/users' && req.method === 'GET') {
    console.log('Request type: ' + req.method + ' Endpoint: ' + req.url);
    userOps.getUsers(req, res);
   }
 }
})
Notice that the HTTP and the URL modules were imported into the file above. These are inbuilt modules in Node.Js, the HTTP module allows you to use the HTTP server and client, and it supports many features of the protocol.
The URL module enables you to do URL resolution and parsing.
The line HTTP.createServer((req, res) is stating that a server will be created with the request called req and response called res.
Note that a file was required, the controller.js file, this is where the logic for the APIs will be written. we’ll create that in a bit.
The routing is done using the if statement, and it checks for the method being called and the pathname before calling the right function as imported from the controller.js file.
This file is exported from the route.js file using the module.exports which is what made it possible for it to be imported into the server.js file.
Now create the controller.js file using touch controller.js and add this code to it.
const url = require('url');
const users = require('./userData.js');
exports.getUsers = function(req, res) {
  const reqUrl = url.parse(req.url, true)
  var response = [
    {
      "message": "Here are the list of users "
    },
    users
  ];
  res.statusCode = 200;
  res.setHeader('content-Type', 'Application/json');
  res.end(JSON.stringify(response))
 }
The file imports the userData.js file created earlier because this is where the data to be fetched lives.
The getUsers function implements what will be returned after the GET ./users endpoint is hit. It basically crafts the message to be sent and sets the header, returns the status code, and stringifies the data response.
Now, on your terminal, run node server.js to start the server, you should get this
Server running at http://127.0.0.1:3000/
Open the link in a browser precisely sending this http://127.0.0.1:3000/user you should get this (if you followed along):

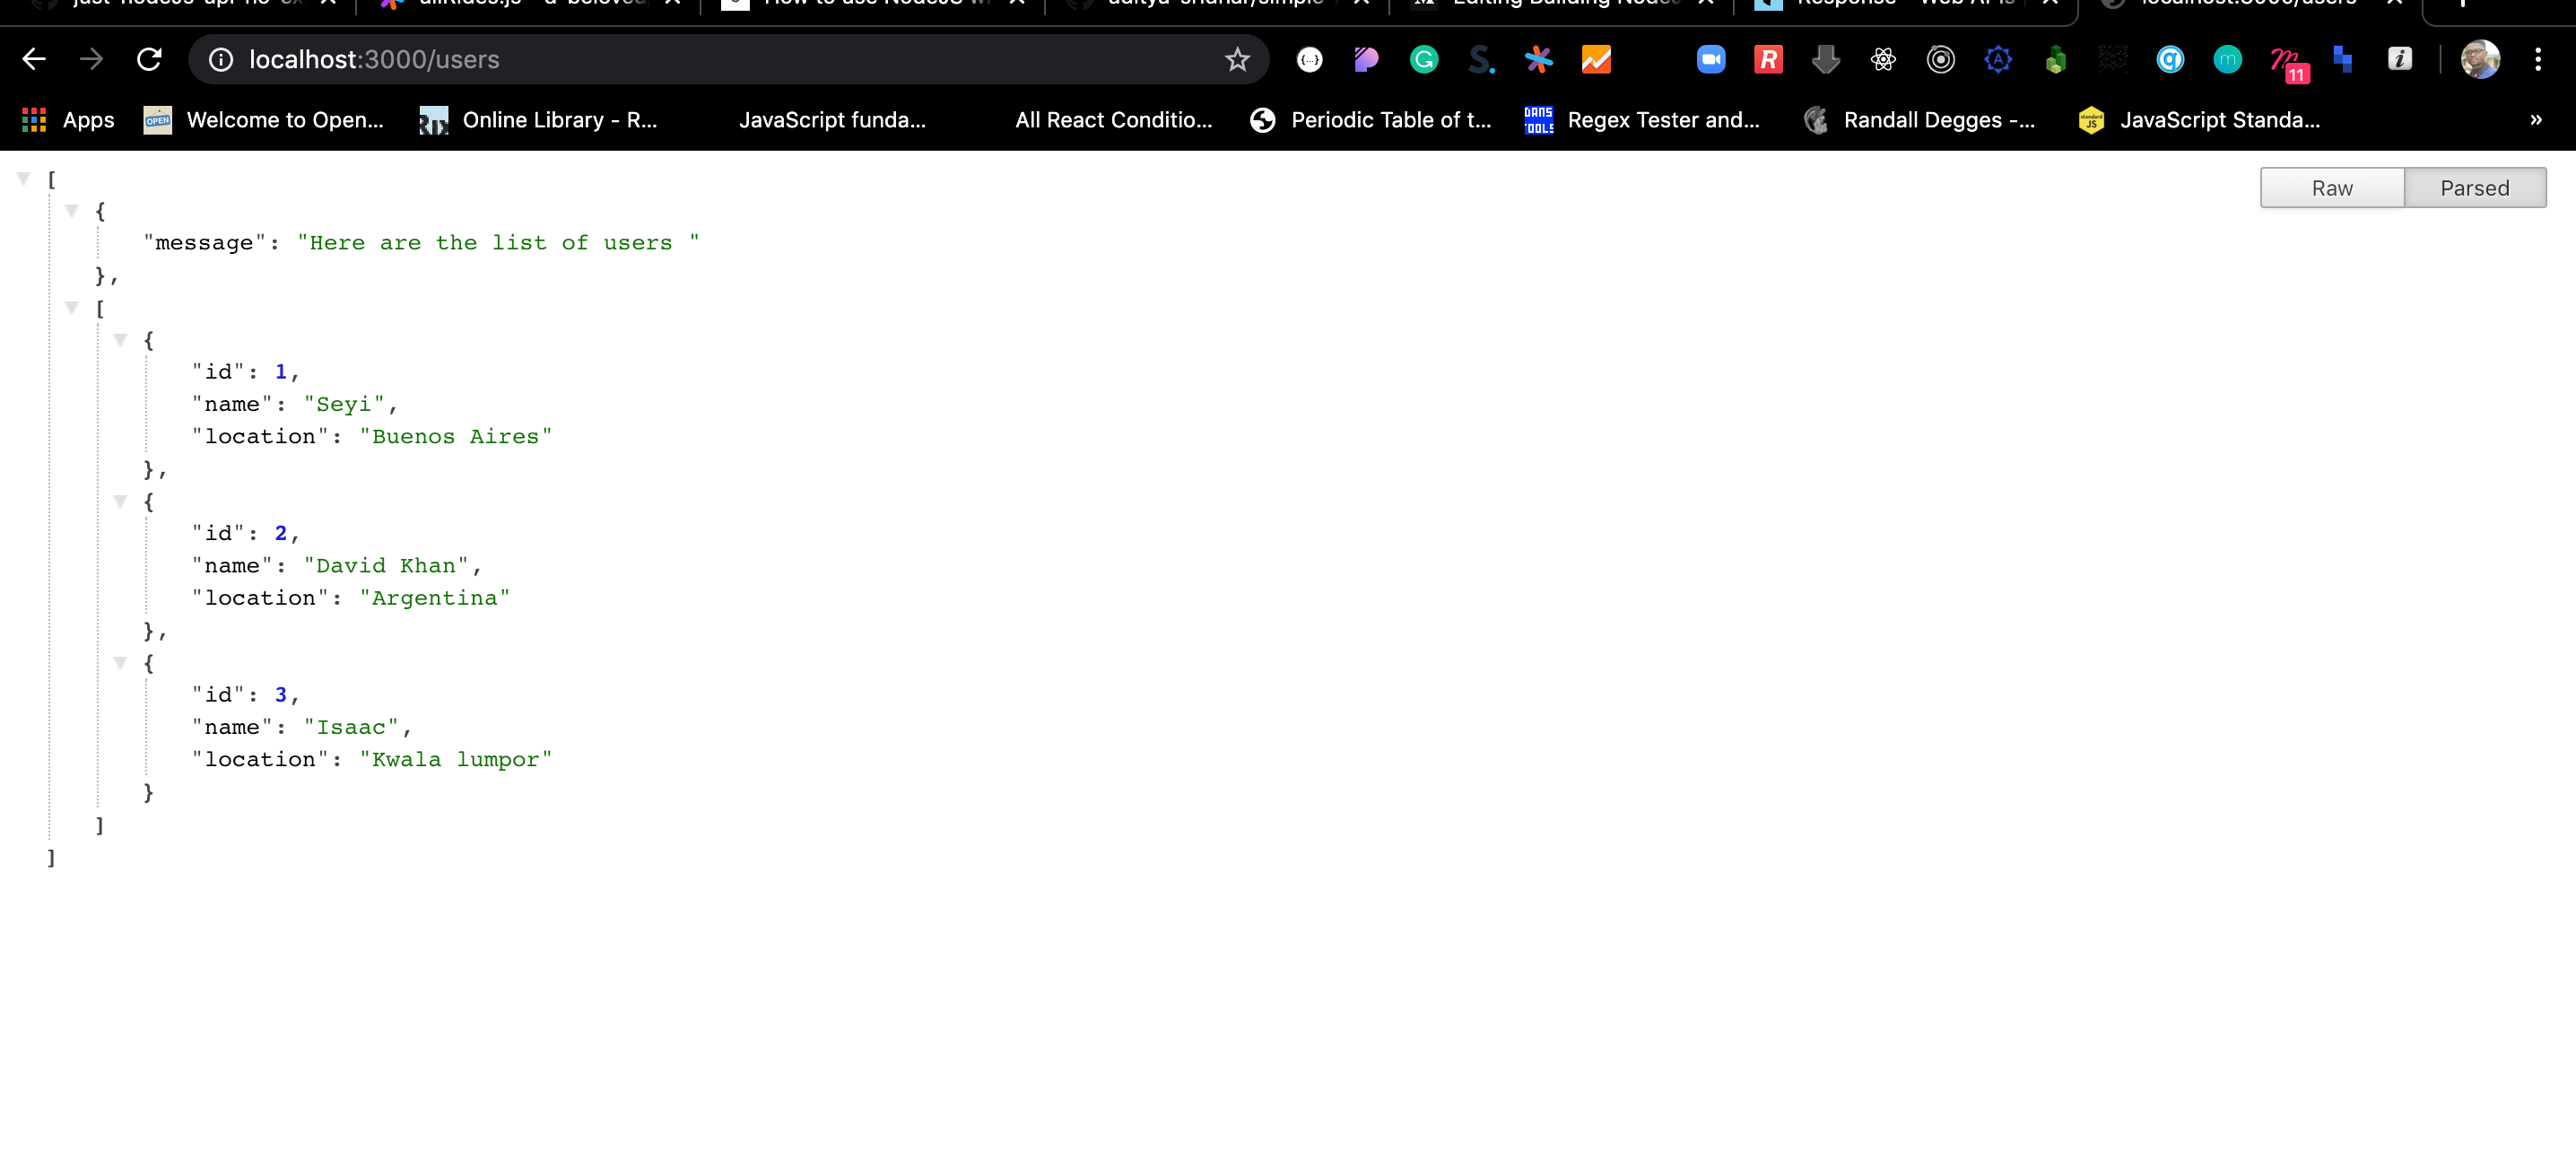
127.0.0.1:3000/users
Note: When you visit a link from your browser, you are carrying out a _GET_ request.
Creation of the POST endpoint
In creating this endpoint, head over to the route.js file, and add this code to the existing code in the file, immediately after the closing parenthesis of the If statement.
...
// POST endpoint
else if(reqUrl.pathname == '/user' && req.method === 'POST') {
   console.log('Request type: ' + req.method + ' Endpoint: ' + req.url);
   userOps.createUser(req, res);
}
...
This endpoint is calling the createUser function inside the controller.js file, let’s head over to the controller to write the function.
Add the following lines of code after the closing parenthesis of the getUsers function
exports.createUser = function(req, res) {
   body = '';

   req.on('data',  function (chunk) {
     body += chunk;
   });

   req.on('end', function () {
     postBody = JSON.parse(body);
     var response = [
       {
         "text": "User added successfully"
       },
       postBody
     ]

     res.statusCode = 201;
     res.setHeader('content-Type', 'Application/json');
     res.end(JSON.stringify(response))
   })
 }
This function operates for creating a new User, it posts the new user and returns a response.
req.on('data',  function (chunk) {
  body += chunk;
});
This is where the data being supplied is fed into the server, it comes in in streams, for info on how streams work in Node.Js, check here.
req.on('end', function() {...}) is called only after all the data has been streamed and the body is complete, it is then converted into JSON format by JSON.parse(body) so that the value in it can be used.
Then the response is returned just like we did in the GET endpoint.
Now, to test this endpoint, run node server.js on the terminal,
Using POSTMAN, let’s test out this POST request.

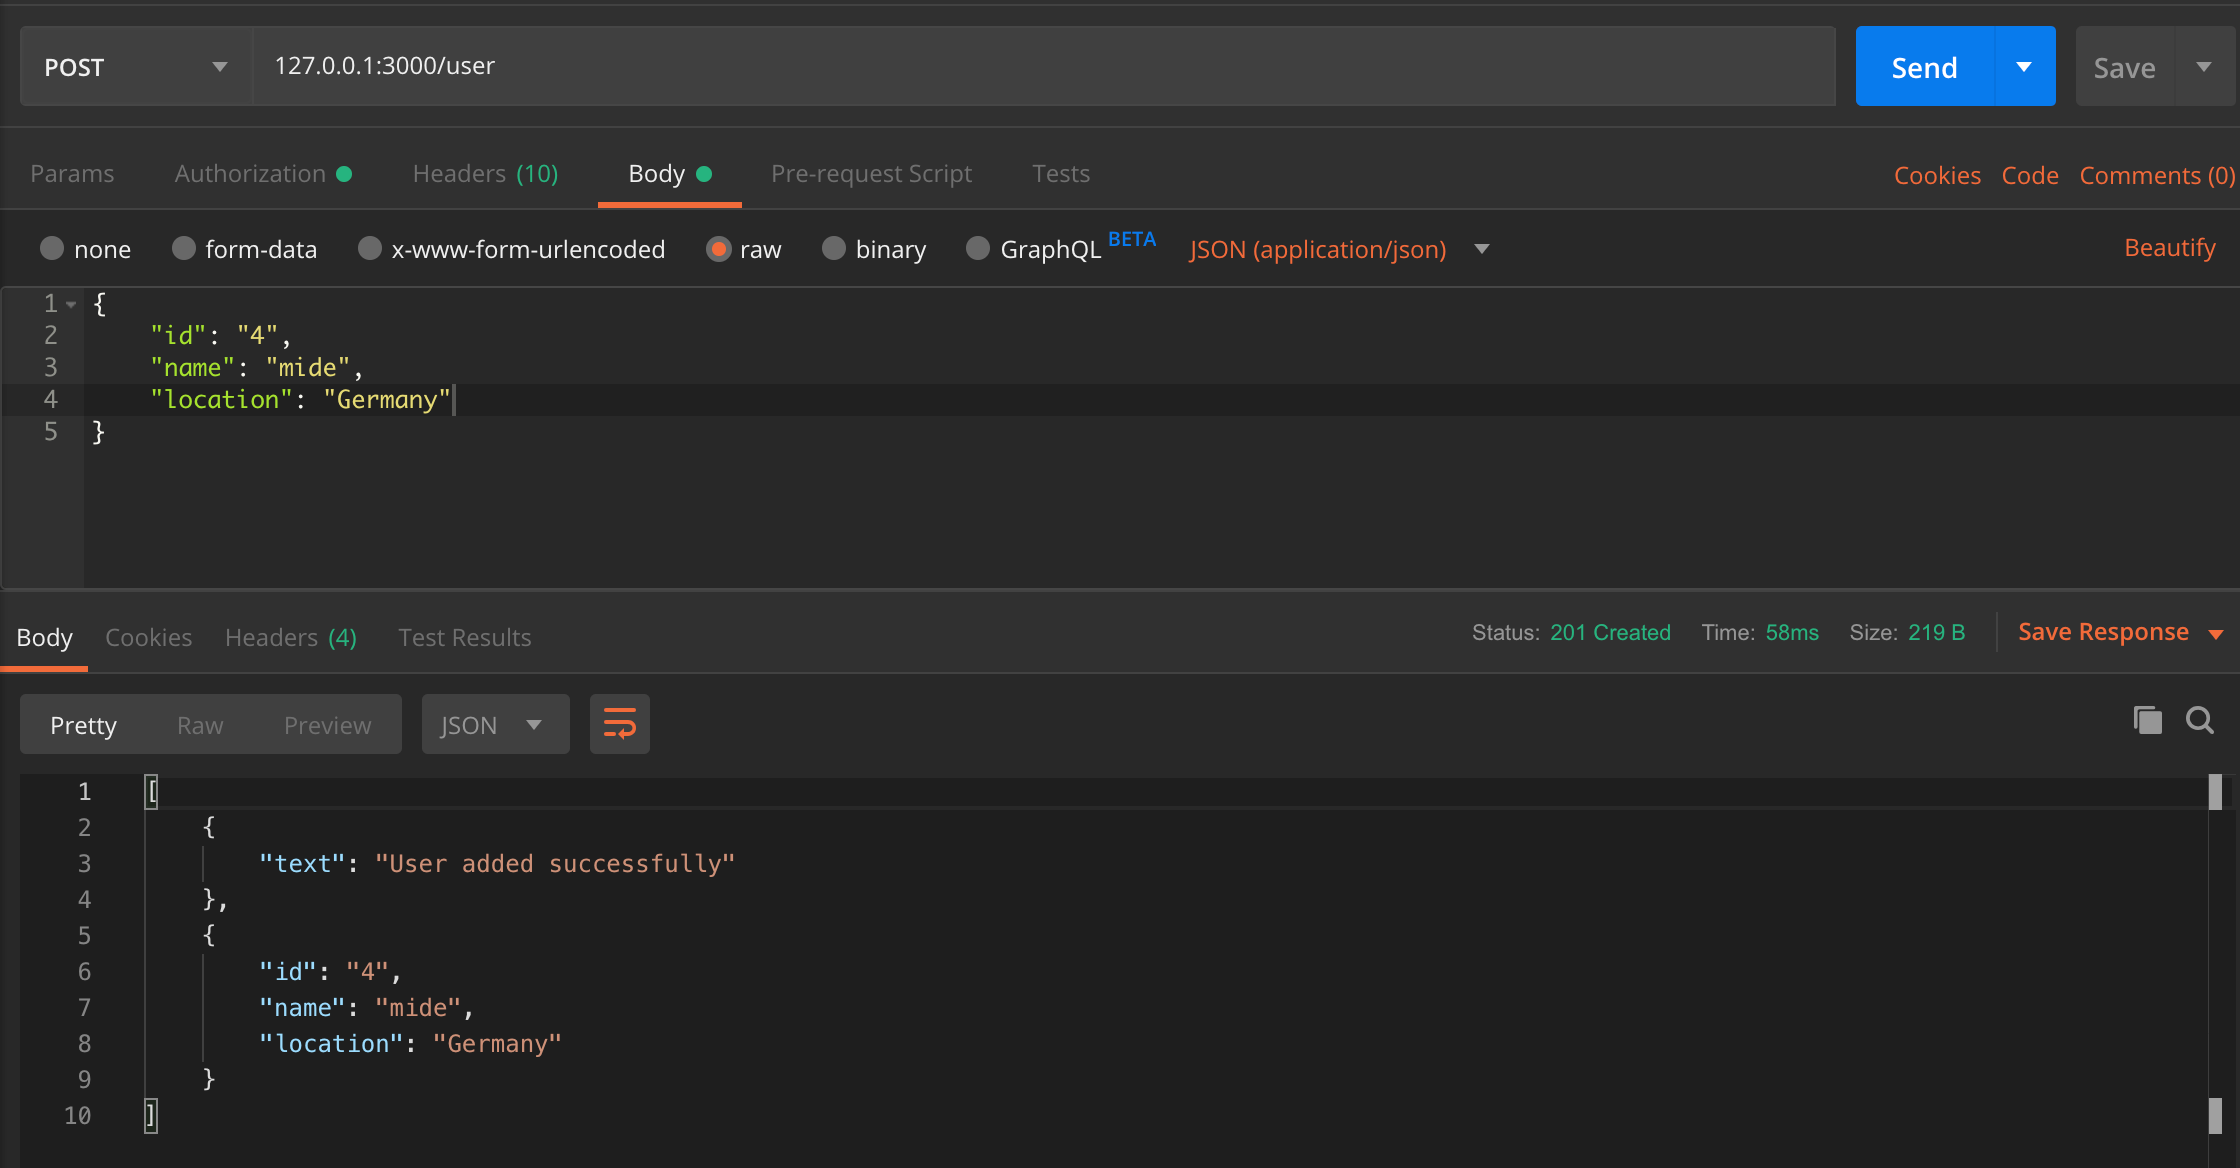
the response got from running POST 127.0.0.1:3000/user
Invalid Requests
As with many web applications, when a user visits an inexistent route, you don’t want to leave them hanging and wondering what the heck is going on with your app. So, to avoid that, we will also build a simple API that will act as our informative 404 API route.
Head over to the route.js file, add the following line of code after the last else if
// invalid URL
else {
  console.log('Request type: ' + req.method + ' Endpoint: ' + req.url);

  userOps.invalidUrl(req, res);
}
Now in the controller.js file, add the following code after the required statements.
const availableEndpoints = [
  {
    method: "GET",
    getUsers: "/users"
  },
  {
    method: "POST",
    createUser: "/user"
  }
]
...
next, in the same file, add the next set of code after the createUser function
exports.invalidUrl = function(req, res) {
   var response = [
     {
       "message": "Oops! that is a wrong endpoint, here are the available endpoints "
     },
     availableEndpoints
   ]

res.statusCode = 404;
   res.setHeader('content-Type', 'Application/json');
   res.end(JSON.stringify(response))
}
Now, let’s test the output also on Postman, start the server using
node server.js
Note that this function(the invalidUrl) will fire if any other endpoint is visited apart from the two endpoints catered for in this project.
Visiting GET 127.0.0.1:3000 will give us the following result

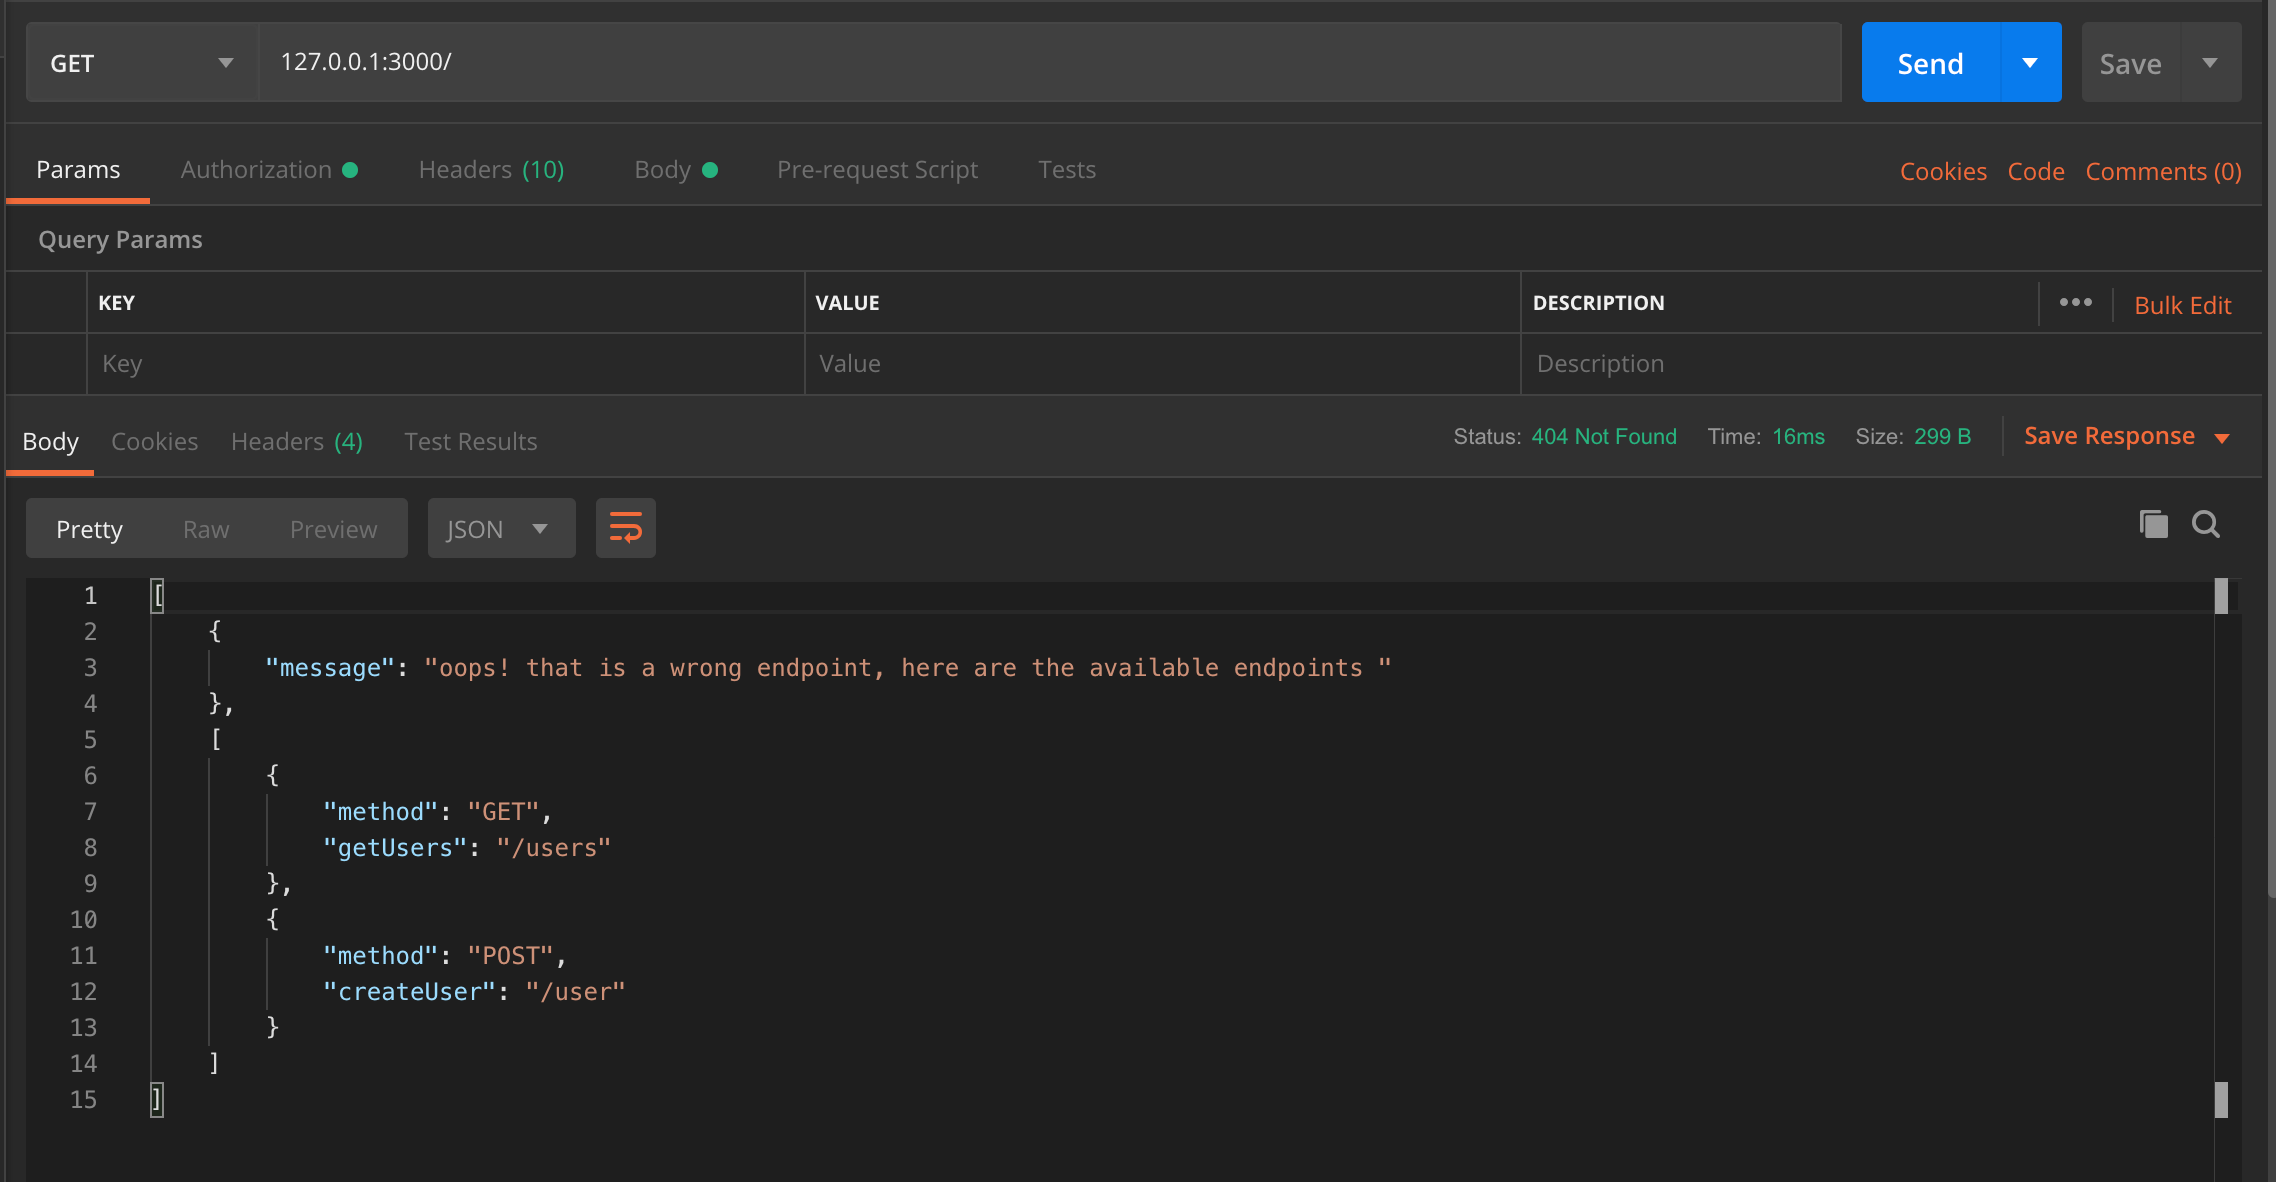
a response message for invalid Url
And finally, we have come to the end of this tutorial 😅
The code is available on github.com
Note: this tutorial is for exploration purpose 👀 , when developing apps, please kindly use any framework that will make your work easier and faster 😃.
Remember to like 😉 if this blog post was informative.
Big Ups to this blog from where I got this inspiration from.